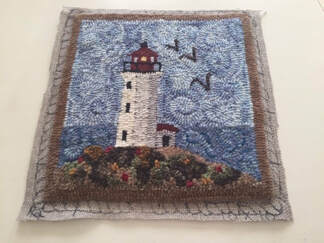
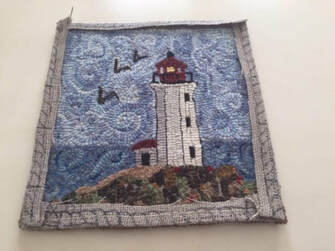
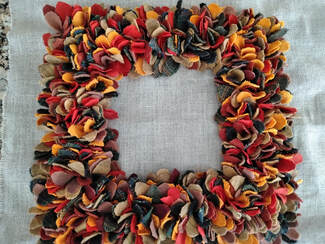
 How to Finish the Wreath Note: You may want to stitch around the outer edges to keep backing from unraveling before cutting. 1. When you think you are finished hooking take the wreath off of the hooking frame and hold it up to a window to look for voids in hooking. Fill in as necessary. It also helps to look at the back side for possible voids in hooking. Example of finished square wreath 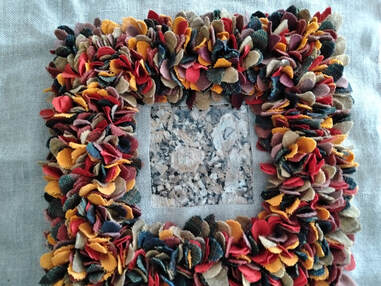 2. Cut out center of wreath backing leaving about 2 inches around hooked area. Center cut out 3. Cut backing material to fit the wreath frame leaving plenty of extra backing to lash backing onto the back of wire wreath frame, see photo. 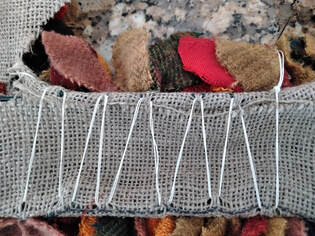 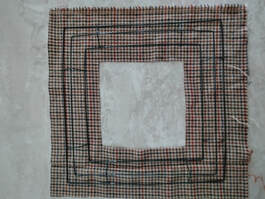 Prepare backing material trace frame out on back of backing material and cut out, leaving excess to allow for turned over hem. 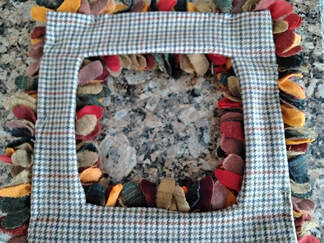 Pin backing to back of wreath to facilitate sewing (I use T pins as sturdy). Determine how you want to hang the wreath. I make a wire loop with florist wire, and sew it to the back of the wreath so that it will catch a hook or nail and not be seen. Enjoy Your Wreath!
0 Comments
These are some of my favorite rug hooking shops. You can find anything you are looking for at one of these shops - from patterns, dyed wool, natural wool to dye, textured wools, wool yarn, sari ribbon, linen/backing, and hooks. Double Click on the website link to visit them. The Gator Rug Hooking Group
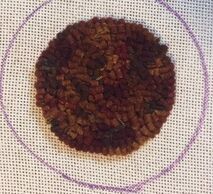
Resources for rug hooking supplies: Palm Cay Rug Yarn - Melbourne, FL - www.palmcayrugyarn.com Hand painted, fine graded dip dyed, and multi-value yarns for rug hooking and rug punching are available. Hand drawn patterns are created for easy framing. Supplies include, a variety of punch needles, backing fabrics, and accessory kits. Fluff & Peachy Bean Designs – Brandon, VT - www.fluffpeachybeandesign.com Whimsical Designs for rug hooking and glorious hand dyed wool. Also has Sari Ribbon, Silk Yarns, and assorted rug hooks. Green Mountain Rug Hooking – Montpelier, VT - www.greenmountainhookedrugs.com Patterns and kits in a variety sizes, details and skill levels. Beautiful hand dyed wool and “on the bolt wool”. Dorr Mill Store- Guild, NH – www.dorrmillstore.com All your wool fabric needs from naturals to hand dyed wool, stash builder bundles, and swatches. They have a wide selection of textured wool. The Woolery – Frankfort, KY - www.woolery.com Rug hooking supplies – such as natural wool, linen/backing, hooks etc. They also have supplies for punch needle and oxford punch. Huge selection of yarns. Searsport Rug Hooking – Rotonda West, FL - www.searsportrughooking.com Many patterns available including beginner kits. Beautiful dyed wool and wool yarn, and so much more. Punch needle kits and patterns along with a huge selection of Valdani colored thread. Honey Bee Hive – Manchester, CT - www.rughook.com They have over 2,800 rug hooking patterns. This includes the Charco selection by Pearl McGown and Jane McGown Flynn rug hooking patterns. The Primco selection features dozens of additional artists, including Kim Nixon’s footstool collection, the whimsical designs of Carolyn Stich, and the Multicolores artists of Guatemala. 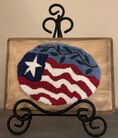 Punch Needle Flag By Peggy Weimer Punch Needle Flag By Peggy Weimer The Gator Rug Hooking Group has a Patriotic Challenge Rug for members who wish to participle. The completed rug should be finished by our April 9, 2024 meeting. This is to celebrate the 250th birthday of our nation. Our goal is to have a local show to display all the beautiful created hooked rugs. We also plan to submit an article to ATHA Magazine to show cast all the Patriotic Rugs. It has been amazing to see our members as they work on there creations for this challenge. Stay tuned to see some of these amazing rugs! 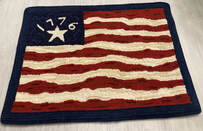 1776 Flag Hooked By Peggy Weimer It was so good to get back to hooking with the group. The masks and social distance was a little strange at first but we all seem to adjust. It was fun to have the Proddy and Mug Rug Challenge project's to work on with others and watch the creativity flow. So many different ideas of Proddy Wreaths, Flowers, and Mug Rugs (as you will see in the photos.) Really looking forward to next season's challenge of a Holiday project. Hope to have a big variety of Holiday's represented. Enjoy the show of Proddy Challenge Photos. Tools and supplies: Rug hooking frame or hoop Large rug hook or proddy tool Rug hooking backing that fits your frame ((such as linen, rug warp, or monk's cloth) Felted wool - your color of choice Needle and thread Scissors Fabric glue Step 1 - Determine the size of your flower. Large Flower: Draw a 5" circle on backing, inside that circle draw a 3" circle. Row 1 petals - 1" x 3"; Row 2 petals - 1" x 3 1/2"; Row 3 petals - 1" x 4" Medium Flower: Draw a 4" circle on backing, inside that circle draw a 2" circle. Row 1 petals - 1" x 3"; Row 2 - 1" x 3 1/4"; Row 3 - 1" x 3 1/2" Small Flower: Draw a 3" circle on backing, inside that circle draw a 1" circle. Row 1 petals 1" x 3"; Row 2 and 3 - 1" x 3 1/4" Note: you can get multiple flowers on one piece of linen by spacing around and leaving about 2" between circles. Preparing your petals: You can either tear or cut the strips to width. Use scissors or a rotary cutter and mat to cut to length. Strips can vary between 1/2" and 1" width and 3" to 4" length. (Anything less than 3" length will be easier to work out of backing and greater than 4" will take much more wool. Cut all your flower petals for your choice project. See below for some suggestions on how to shape your petals. 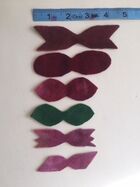 Save your wool snippets to stuff the flower back later. Position your backing on your rug hooking frame or hoop - pulling it very tight. Begin filling the center with any technique of your choice. Some different ways to do the center are:
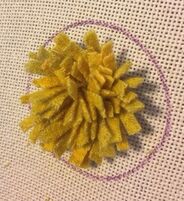
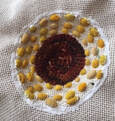
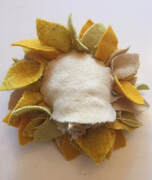
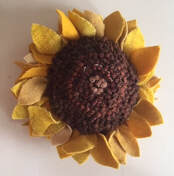
Hooked Center Waldoboro Center Proddy Center # 5 - 8 Cut See Instructions Below #8 Or #9 Cut 2" Length To proddy you will pull the petals from beneath the backing to the top using a large rug hook. First Row: Using your rug hook, pull one end of the petal through the backing very close to the center. Skip a few holes and pull the other end of petal through. Skip a few holes and push your hook down in a hole and pull the next petal up through the backing. Skip a few holes and pull the other end of petal through. Continue in this manner until the first row is complete. Repeat "first row" instructions above for all rows until the outer circle is full.  Large Flower - Hooked Center About 70 Petals 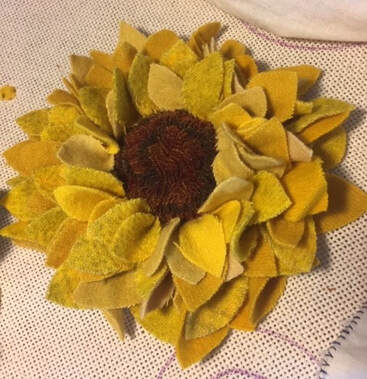 Medium Flower - Waldoboro Center About 50 Petals 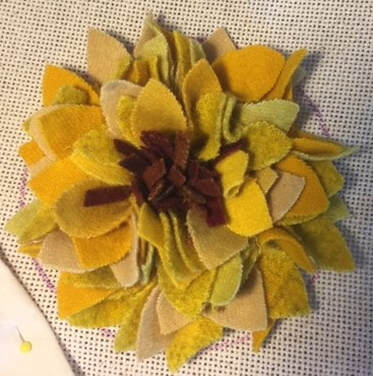 Small Flower - Proddy Center About 40 Petals How to finish the flower: 1. On the back side of your flower - rub some glue around the outside of the petals. This will keep the backing from unraveling. Let dry. (See Figure A)
2. Trim the flower from the backing leaving about 1/2" border of backing around the flower. (See Figure B Above) 3. Fold the border into middle of the flower and baste stitch the backing into the center. 4. Cut a piece of wool for the back of your flower making it about 1/4" larger than the center circle - depending on the size of your flower from step 1. (Color of wool backing is of your choice.) 5. Another way to finish the back is hook a circle about 1/4" larger than your center circle. Prepare the hooked back following instructions 1 - 3 from above. 6. Stitch around the edge of the backer piece of wool making sure to stitch to the base of the petals and not the backing. When you have about 1" opening - stuff your snippets inside the flower backer to round it out and continue to close.
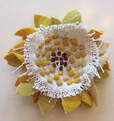
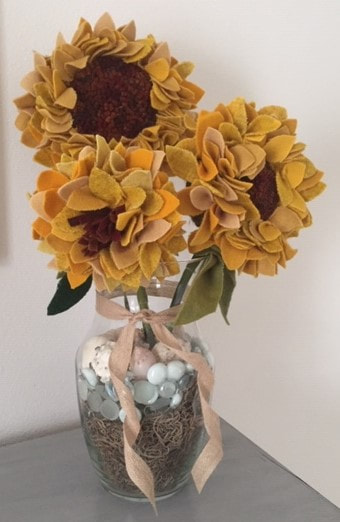
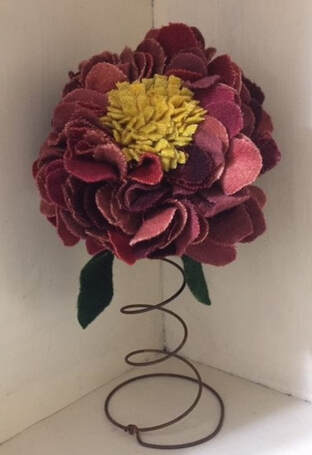
Have fun making these Proddy Flowers! Be creative and display them in different ways. Some ideas are shown below! Use your flowers in many ways.
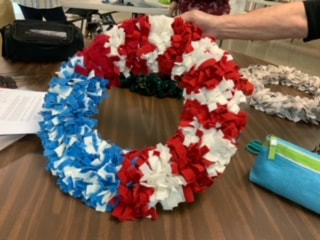
Mount them on a stem and Mount them on display in a vase a rusty spring 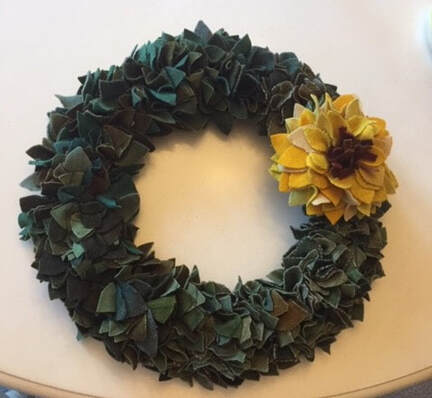 Attach them to a Proddy Wreath Share your completed projects on our Facebook page. "The Gator Rug Hooking Group" Waldoboro Instructions: This technique makes for a strong three dimensional statement. Works great for Black - Eyed Susan, Shasta Daisies, and Sunflowers. Tweed wool add realism to these centers. For Waldoboro - break all rules of hooking and never skip any holes when making loops. To begin, start on the outside of the center circle and hook a row of normal height loops using a #6 cut. (For a softer finished a smaller cut can be used.) Clip each loop of the first row - making all tails the same size. 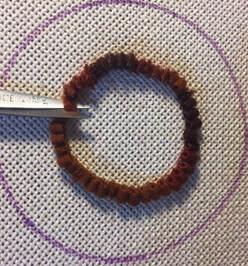 Hook the second row butted up next to first row and raise the loops a little higher than the first row. Clip the loops as before. Continue making higher rows until the loops "stair step" up to the center. 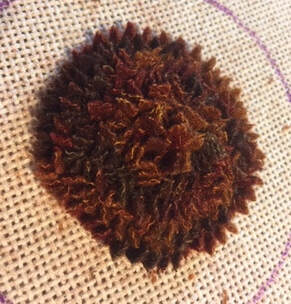 Proddy center before sculpted Take the pattern off the frame for the next step. (This will be messy.) Sculpt a smooth and rounded center. Carefully trim away the edges of the wool to smooth and round the surface toward the center. Placing a finger underneath and push up on the center makes it easier to trim. 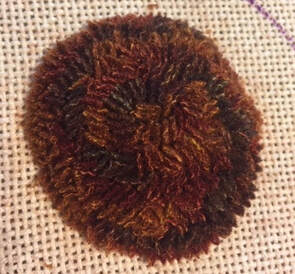 Proddy center after sculpted Remember it is easier to take more off than put more back on so trim gradually.  Waldoboro does take a little more work, but the end result is spectacular.
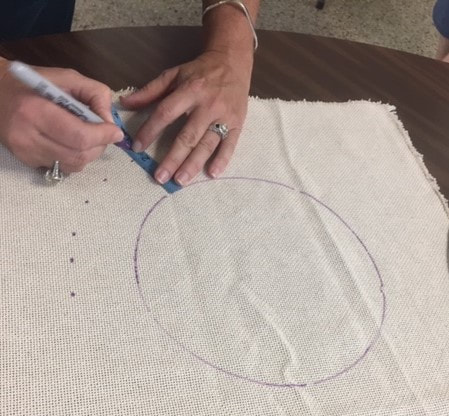
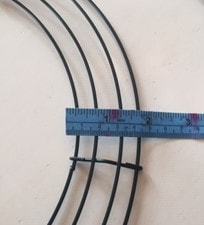
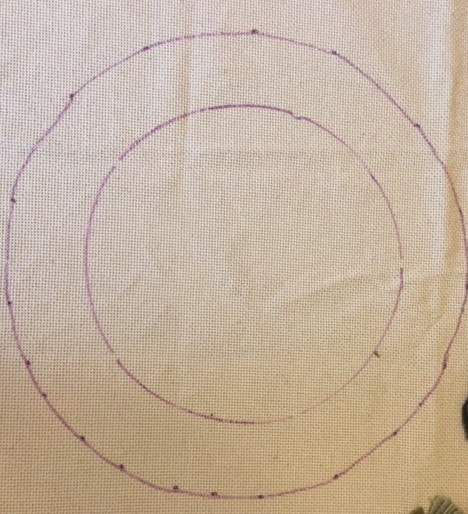
Supplies: Rug hooking frame or hoop Rug hooking backing to fit your frame (such as linen, rug warp or monks cloth) Felted wool (color of choice.) (This is a good time to use up all those little pieces of scrap wool.) Wire wreath frame - can find them at Michael's or Amazon (Instructions are for a 12 Inch) Marker Tape measure Scissors Needle and thread Proddy tool, large rug hooking hook, or surgical hemostat Prepare your pattern:
Prepare your leaves:
Getting ready to Proddy:
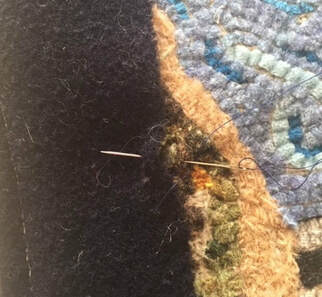
Using a large hook insert it into the backing about five holes away from the stitch line. Holding a leaf strip underneath pull one end of leaf up to the top - skip over a few holes and insert hook into backing again and pull up other end of leaf. Repeat this process until all the backing is filled around the entire circle. When using a Proddy tool you will be working from the underneath pushing the leaf from the back to the front. Looking forward to seeing all these creations. How to finish your wreath will be the next step coming soon. Have Fun! Color Ideas 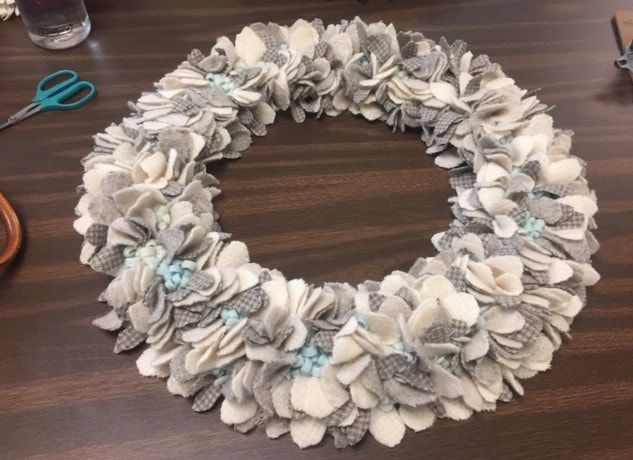 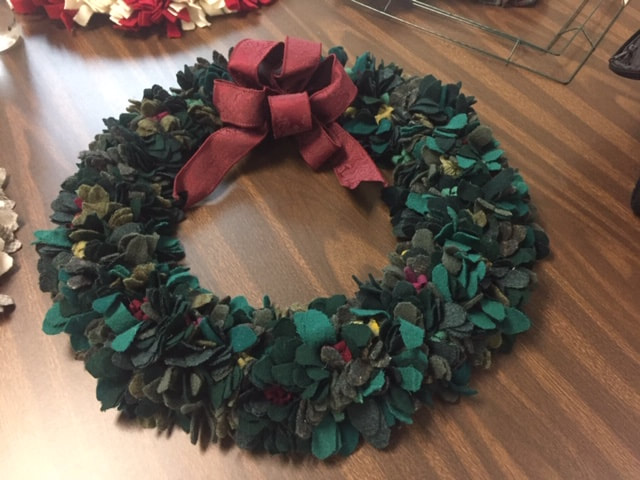
FIGURE D
FIGURE F  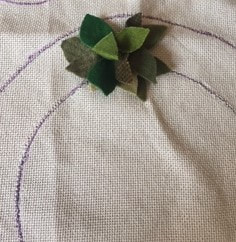 FIGURE G
How much wool will you need?
Length x width x 6 ÷ 1440 = yd’s needed Measure hooked area in inches How to clean your Hooked Rugs
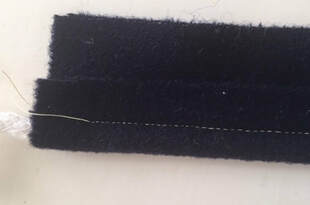
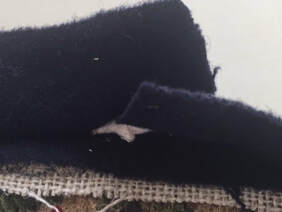
Cleaning solution recipe: 1 tablespoon granulated Tide (no additives of any kind) 1 cup white vinegar 1 gallon of warm water Mix vinegar and water together in a bucket. Dissolve Tide in water solutions. Make soap suds. Put suds on rug and rub suds in a circular motion moving from center outward. Let dry and then vacuum rug. Provided by Laurie Manthorne 1. Press and prepare Hooked Rug to be finished. Machine stitch about 1 inch from hooked area all around rug. Cut linen away from rug along the outer stitched line. Fold the linen edge to the back of rug and press down. See pictures A and B.
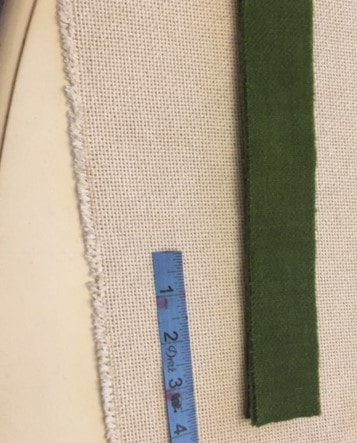
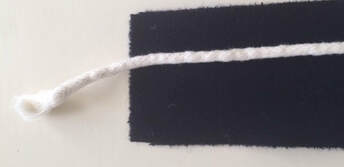
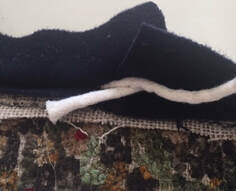
2. Cut strips of 3 inch wool pieces to go around the entire piece adding at least 6 inches for overlapping at the ends. It is best to use as long a strip of wool as possible to eliminate having too many seams. Machine stitch ends together making one long strip of wool. Lay cording on the 3 inch strip of wool and fold over about 1 inch. Machine stitch as close to cording as possible. See pictures C and D.
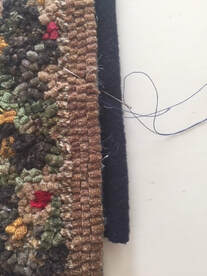
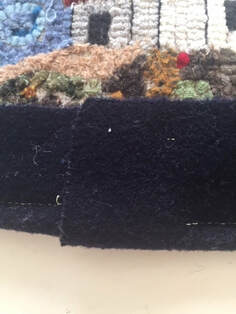
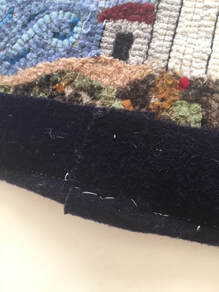
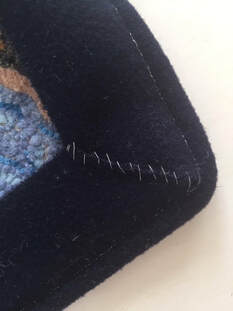
3. Lay the sewn corded wool strip to the bottom edge of the hooked rug. Begin hand stitching about 3 inches from the end of trim. See picture E. Make sure to stitch between your loops and not through the wool loops. Stitch around the entire piece leaving about 3 inches at the very end for overlapping. See picture F.
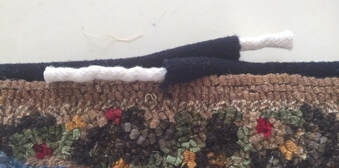
4. Your finished rug trim should look like picture F at this point. 5. To finish the corded edge take one end of trim and pull back the cord and place the wool over the other corded end. You may have to trim some wool off the end to make it lay flat. See picture G. Snip the cord ends and place the wool together. See picture H and I. Hand stitch the wool around the cord. See picture J.
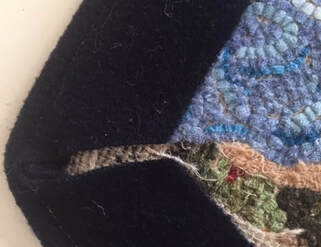
6. Hand stitch the corded wool to bottom edge closing up your overlap. See picture K. 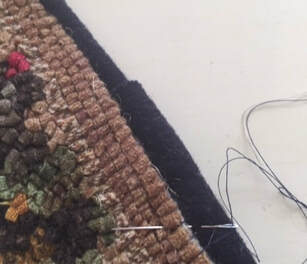 Picture K - Stitch cord trim to finish 7. To finish the corners pinch the wool together and snip at an angle. See pictures L and M.
8. Hand stitch the corner angles together. See picture N.
9. Hand sew the wool binding to the back of the rug. See picture O. Enjoy your finished Rug!
Sibyl Osicka came to Sebastian for a three day workshop on January 21st – 23rd for members of the Gator Group Rug Hookers. A total of seventeen members signed on to the workshop to learn from one of the best McGown instructors in the nation. Her emphasize was on fine shading, however, she stated “Not everyone is interested in fine shading and that is fine, but some of my thoughts can be taken over to wide cut and applied.”
This was a very well organized workshop and many different areas of rug hooking were covered. Sibyl covered so many avenues of rug hooking that it did not matter if you were a beginner, intermediate or advanced hooker, everyone learned something in this workshop. She shared many helpful hints during this workshop. Some of them are listed below.
|
||||||||||||||||||||||||||||||||||||